Analytics
An Analytics Integration is how you can send completed transactions data into the reporting system of your analytics provider. Having the transaction data within your reports helps you to measure sales against other metrics like site traffic and advertising campaigns.
Commerce has built-in support for the most widely use analytics provider Google Analytics directly and via Google Tag Manager.
If you use a different analytics provider, or have more complex requirements, the transaction data can be provided to your reports by having a web developer perform a Custom Integration.
The instructions below will guide you through connecting using the method of your choice.
Google Analytics
Google Analytics is a reporting tool that tracks visits on your website and provides insights into what is occurring, it helps you to make informed decisions regarding your site.
If you do not already have a Google Analytics account, you can create one by following Google's Documentation.
Integration with Google Analytics requires three primary steps:
Ensure that you have the Google Analytics Tracking Code on your site.
Turn on Enable Ecommerce in Google Analytics.
Turn on Google Analytics in Commerce.
TIP
The built-in Google Analytics support is intentionally simple. If your site has more complex requirements (e.g. multiple codes/properties), you should leverage a Custom Integration.
Tracking Code
The Tracking Code is how Google Analytics is able to register site visits and send that information back to their reporting systems.
Commerce supports the following tracking codes and will automatically determine which one is installed on your site:
gtag.js
The Global Site Tag code is Google's latest & recommended tracking code system.analytics.js
The Universal Analytics code is Google's previous tracking code system.ga.js
The Legacy code is the oldest supported version of Google's tracking code system.
Enable Ecommerce
Google Analytics does not display Ecommerce reports by default, so you'll need to enable it in the settings.
To Enable Ecommerce:
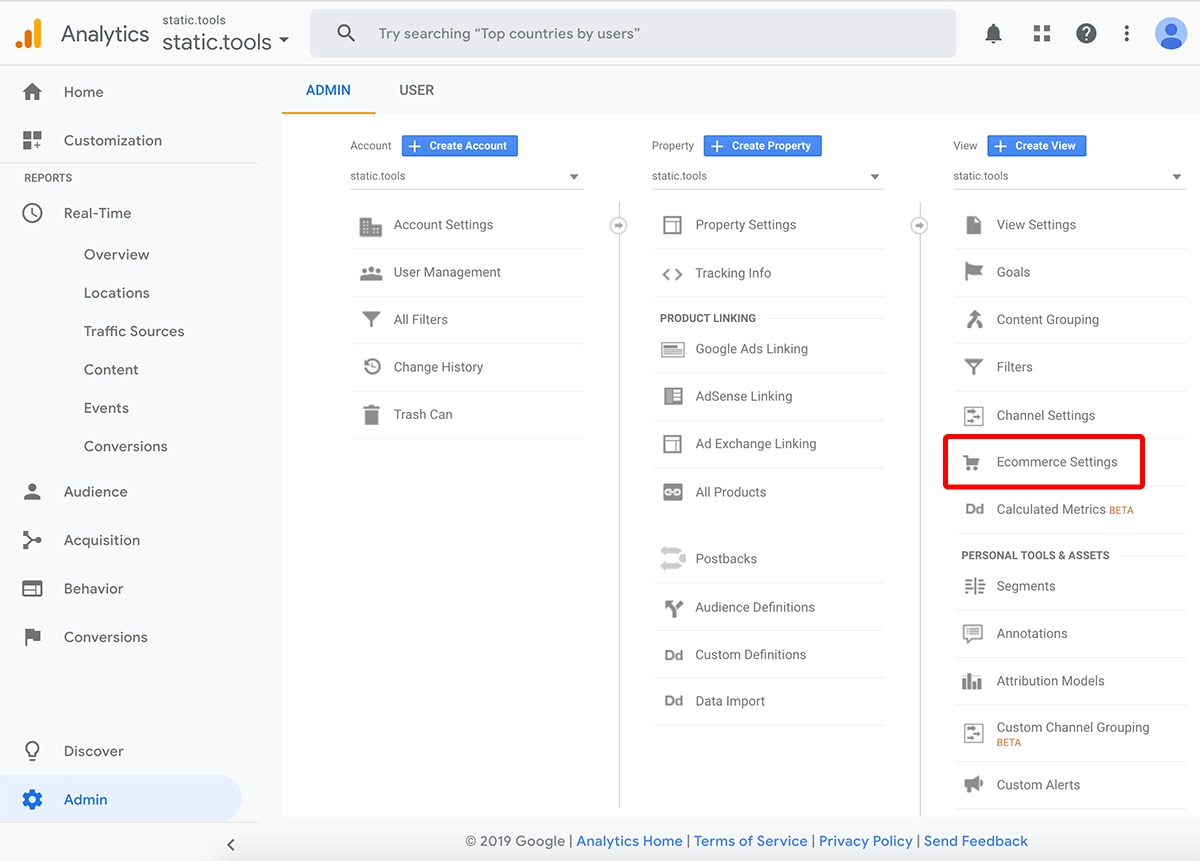
Log in to your Google Analytics account and navigate to the Admin area.

Select the Ecommerce Settings option.
Turn on the Enable Ecommerce switch.
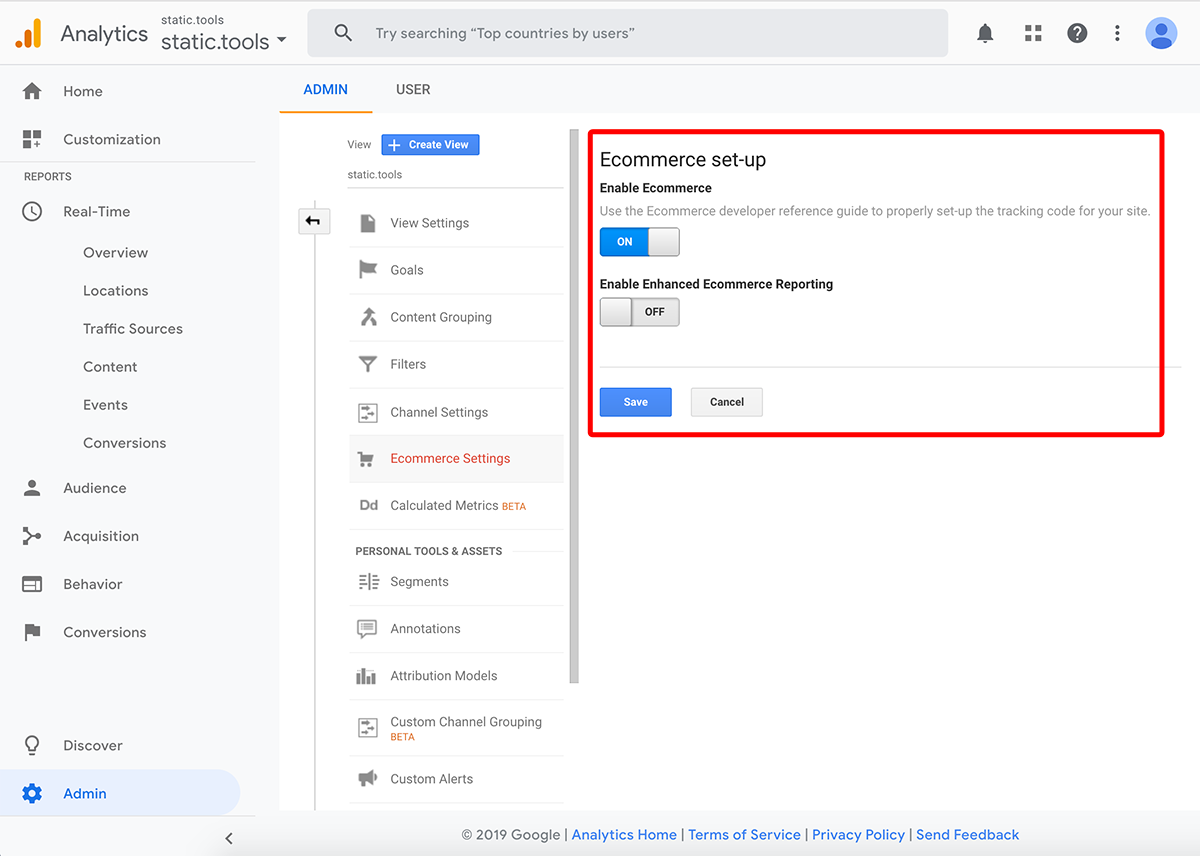
Press Save.
Enable Google Analytics
Commerce does not send transaction data by default, so you'll need to enable it in the settings.
To Enable Google Analytics:
Log in to your Commerce account and navigate to ...
TODO
Add a screenshot
Turn on the Google Analytics switch.
TODO
Add a screenshot
CONGRATULATIONS
🎉 You have now completed the connection between Commerce and Google Analytics.
Google Tag Manager
Google Tag Manager (GTM) is a separate Google product used to add tags to your site and direct the flow of data without the need for source code changes.
It is a flexible system that requires more configuration, so it is best suited to advanced requirements.
WARNING
These instructions only outline integrating Commerce transaction data into Google Analytics via GTM. For additional information on using GTM please seek other documentation.
Integration with Google Tag Manager requires five primary steps:
Turn on the Enable Ecommerce switch in Google Analytics.
Add a Variable in GTM containing your Google Analytics account settings.
Add a Trigger in GTM to listen for the Transaction event sent by Commerce.
Add a Tag in GTM to listen for the Trigger and submit the details to Google Analytics.
Enable the Google Analytics - gtm.js integration in Commerce.
Add GTM Variable
Add your Google Analytics settings into a Variable for easy use elsewhere in GTM.
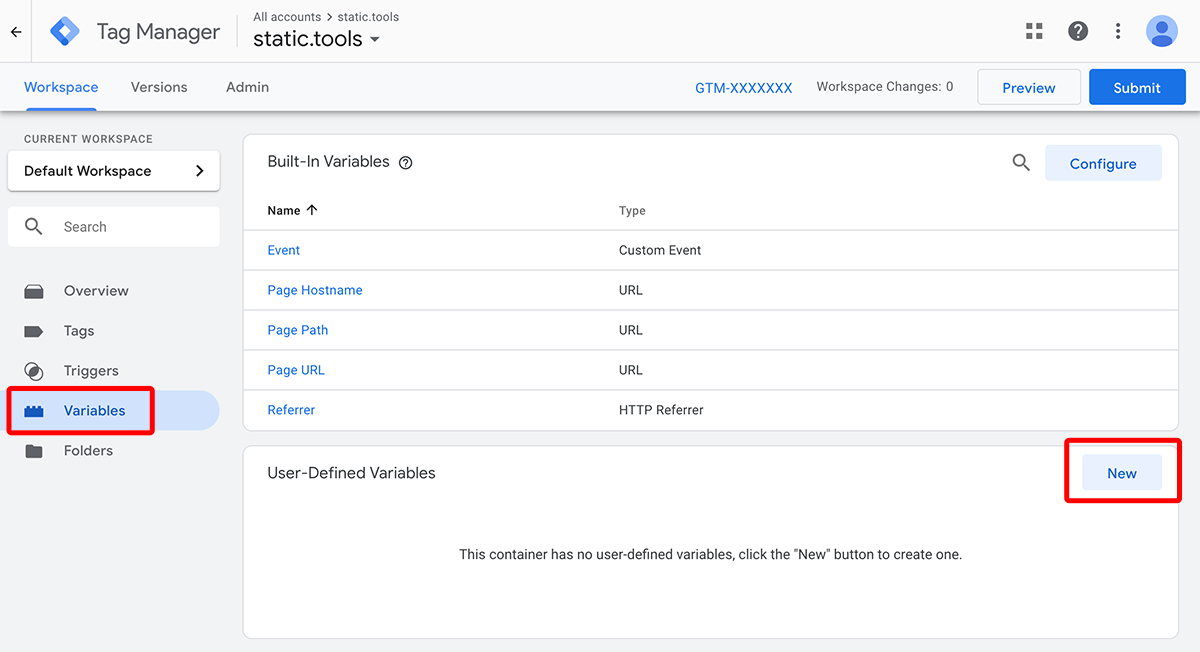
Open GTM, navigate to the Variables section and press the New button.
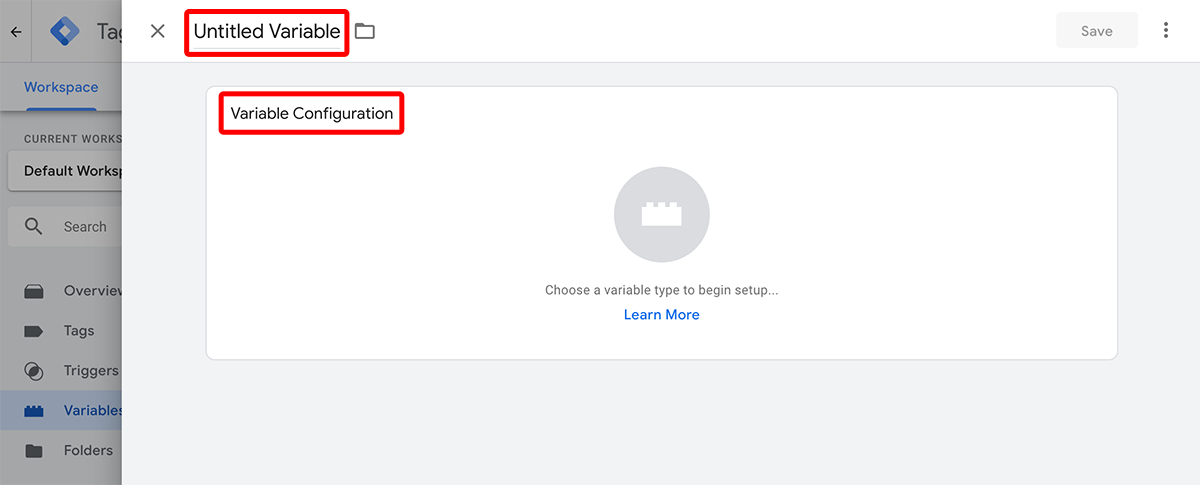
Name the Variable, then click on Variable Configuration.
Scroll down the options to find the Google Analytics Settings item and select it.

Insert your Google Analytics tracking code, (press the ? button for help if you do not know it).

Press Save.

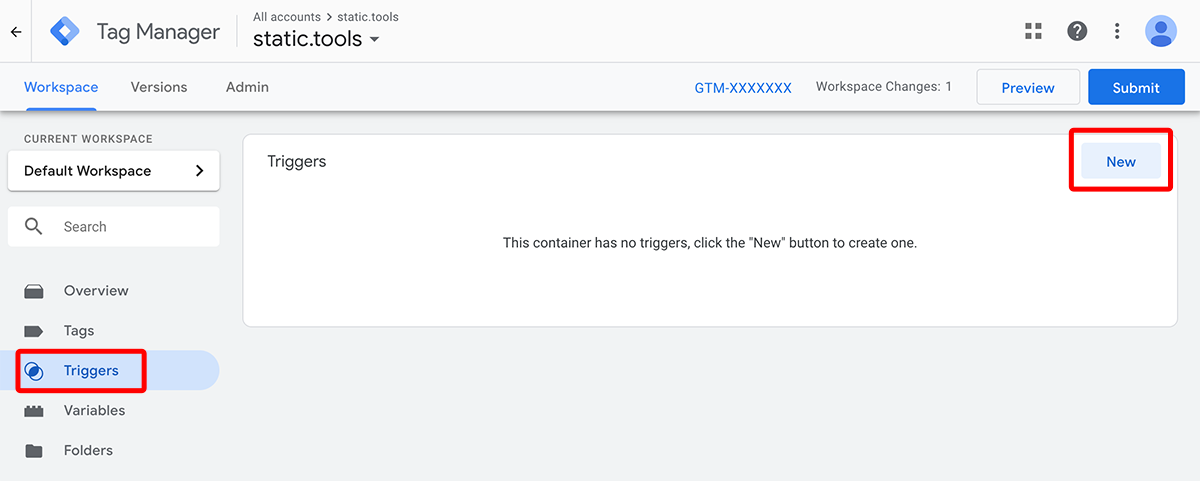
Add GTM Trigger
The Trigger listens for the Transaction event being sent by Commerce.
Navigate to the Triggers section in GTM and press the New button.
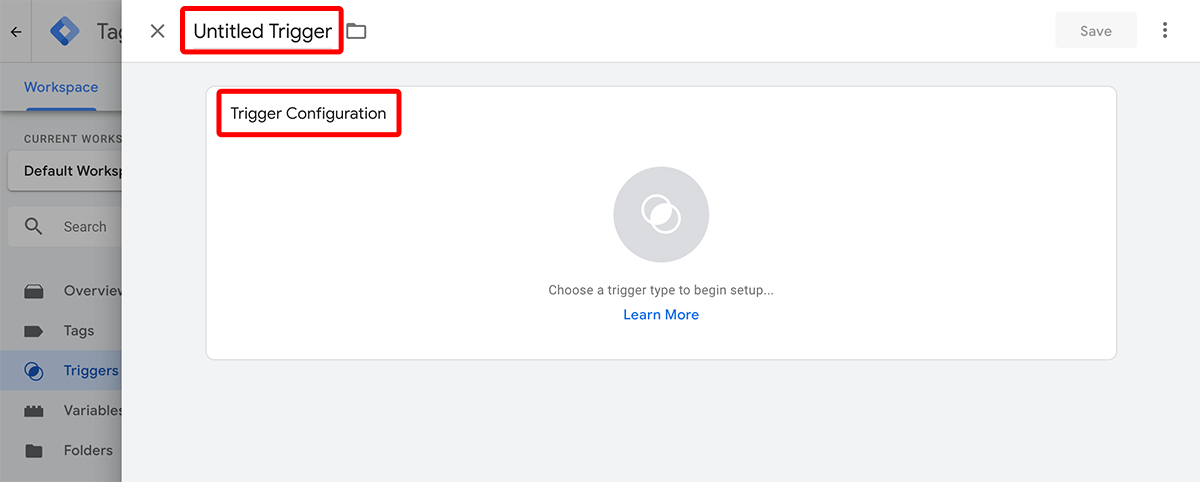
Name the Trigger, then click on Trigger Configuration.
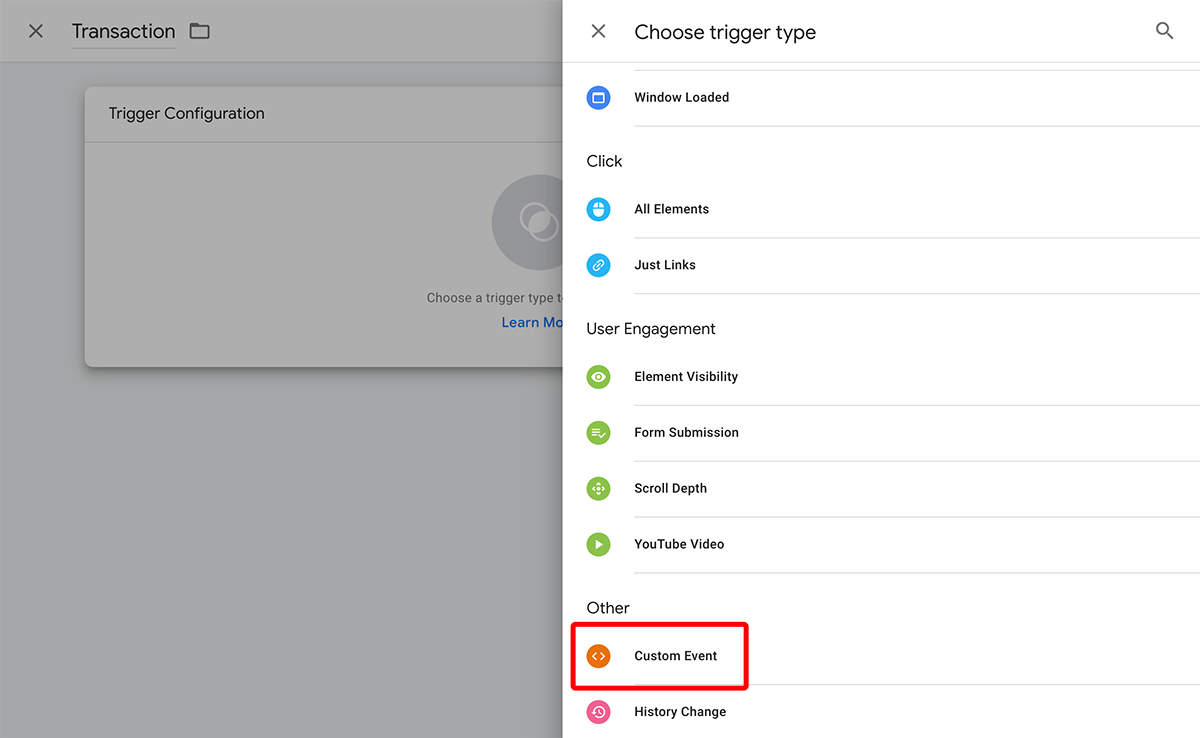
Scroll down the options to find Custom Event and select it.
Set the Event Name to
transaction.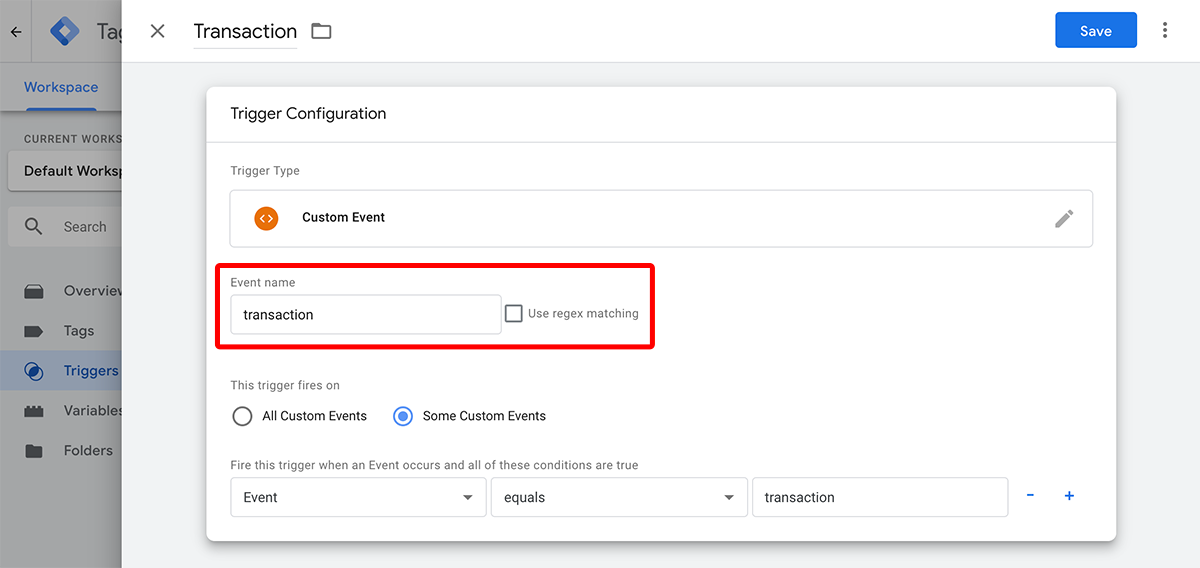
Set This trigger fires on to
Some Custom Events.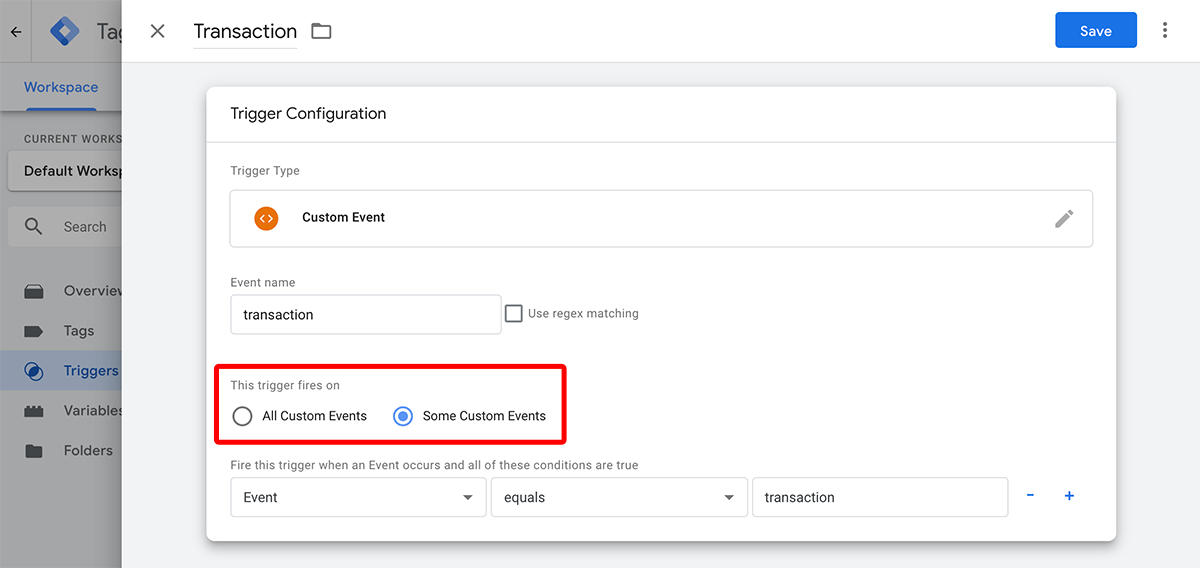
Set the Fire this trigger... conditions to
Eventequalstransaction.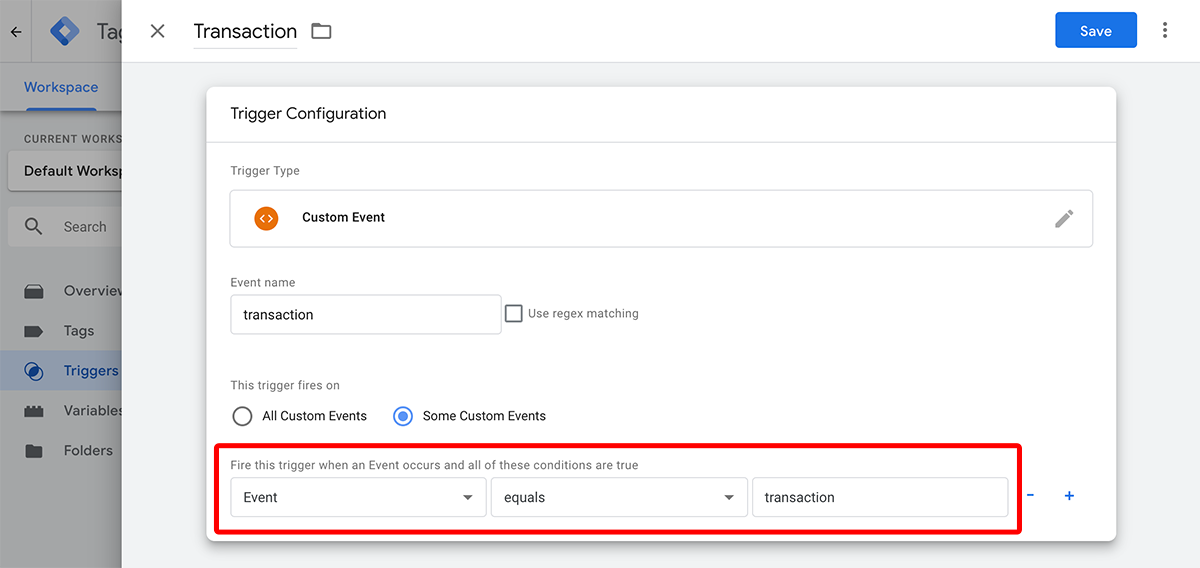
Press Save.

Add GTM Tag
The Tag associates the Trigger with your Google Analytics account using the Variable.
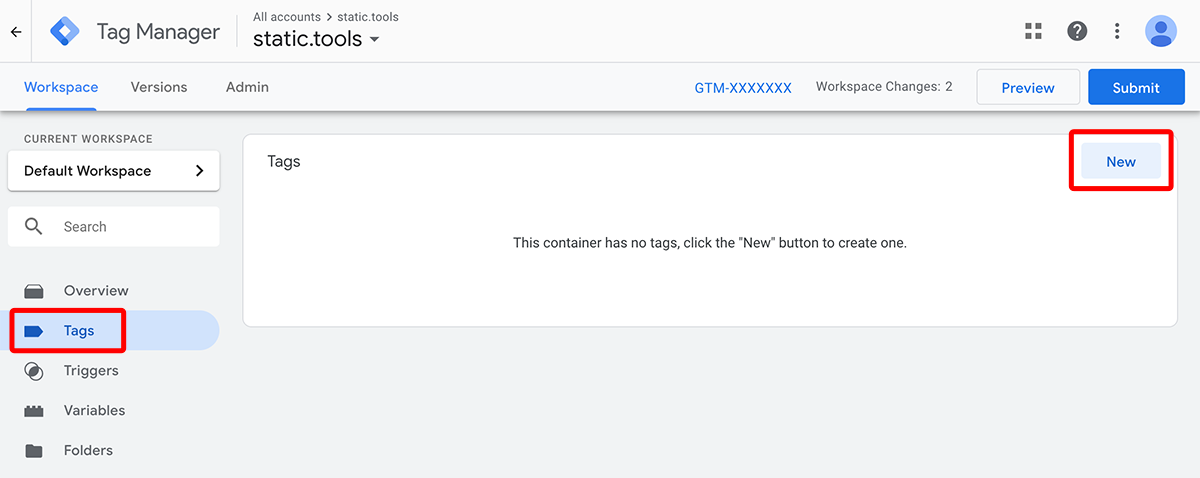
Navigate to the Tags section in GTM and press the New button.
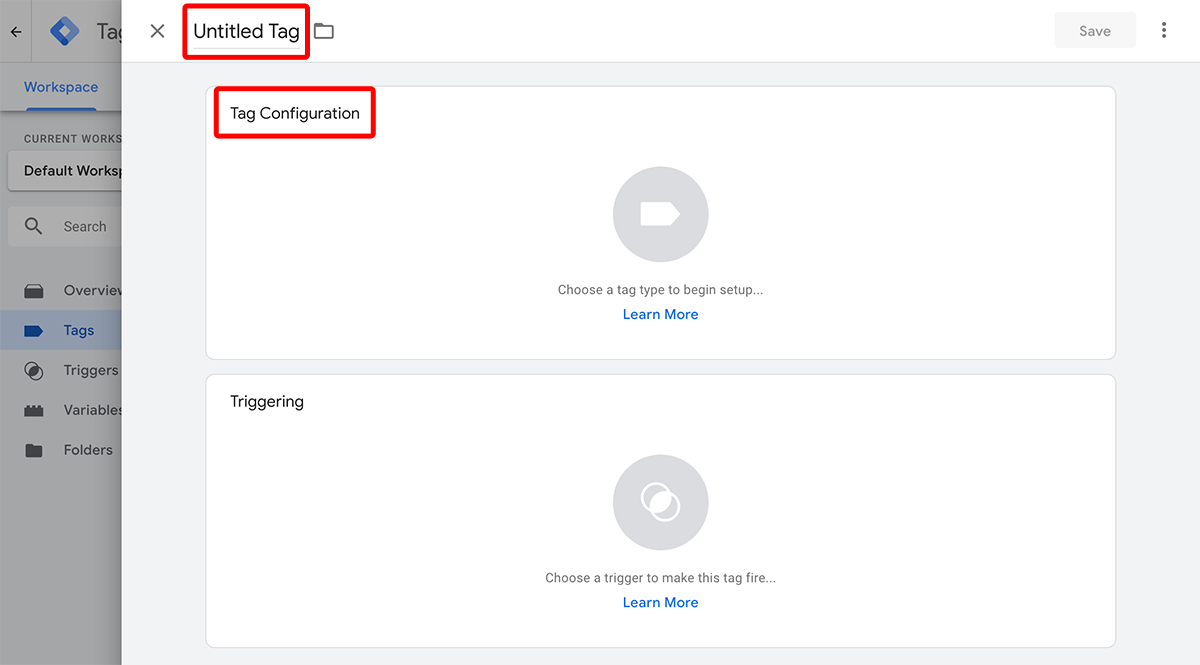
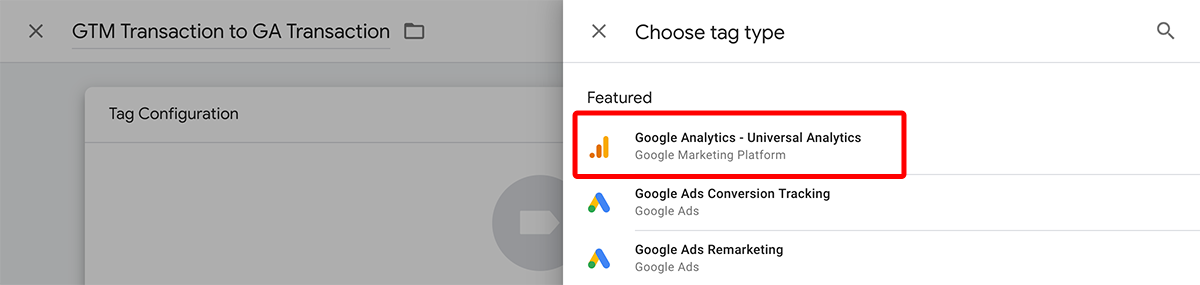
Name the Tag, then click on Tag Configuration.
Find the Google Analytics - Universal Analytics option and select it.
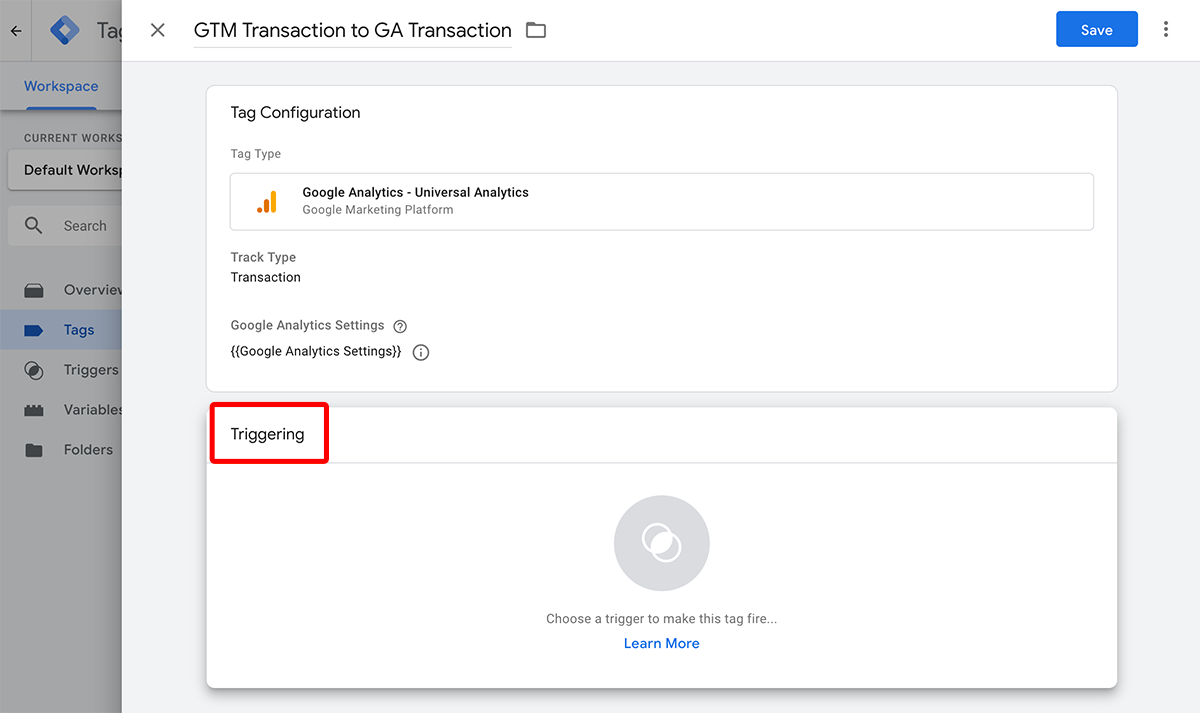
Set the Track Type to
Transaction.
Set the Google Analytics Settings to the Variable created earlier.

Select Triggering.
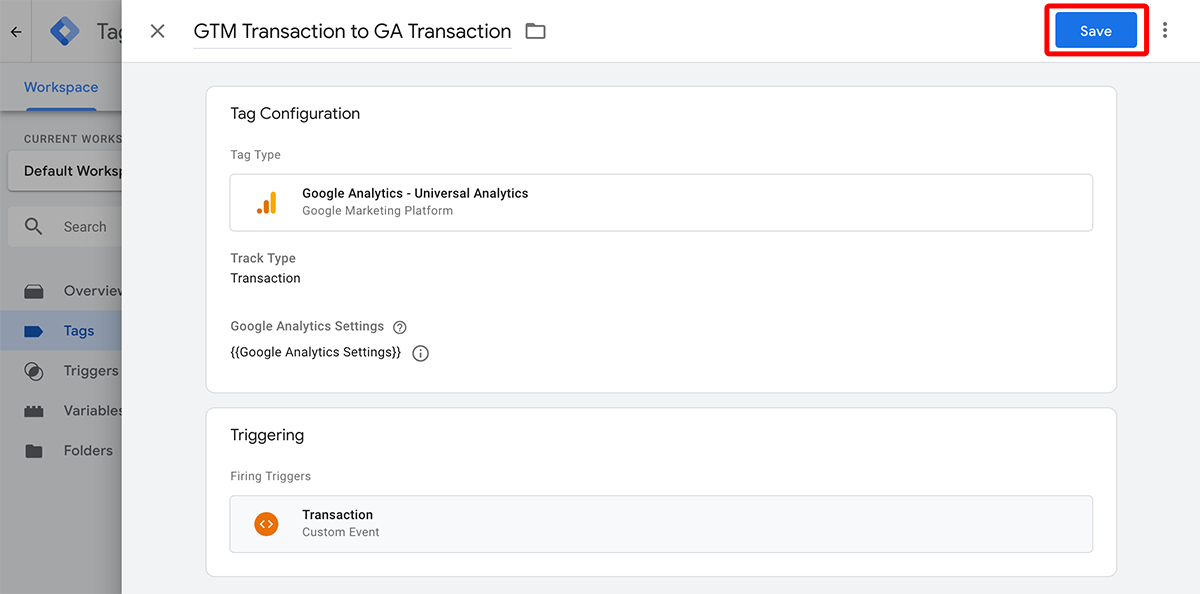
Select the Transaction Trigger created earlier.

Press Save.
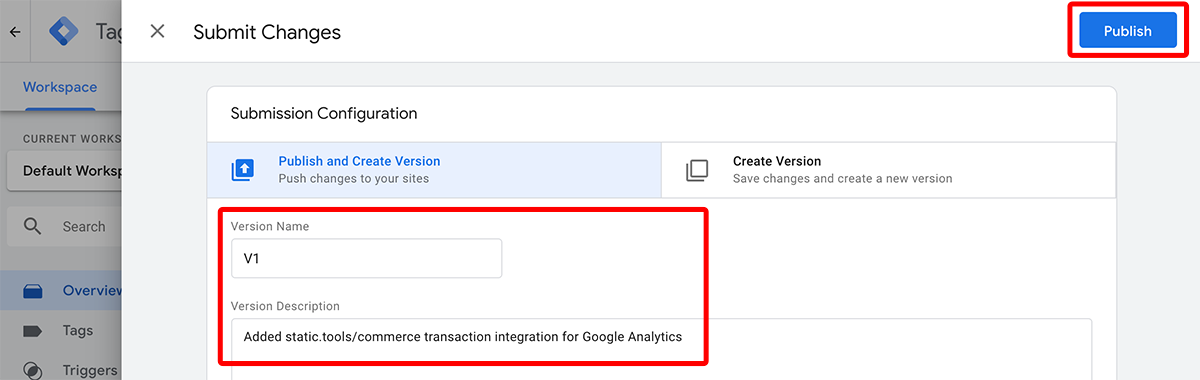
Remember to Submit your GTM Container to publish it.
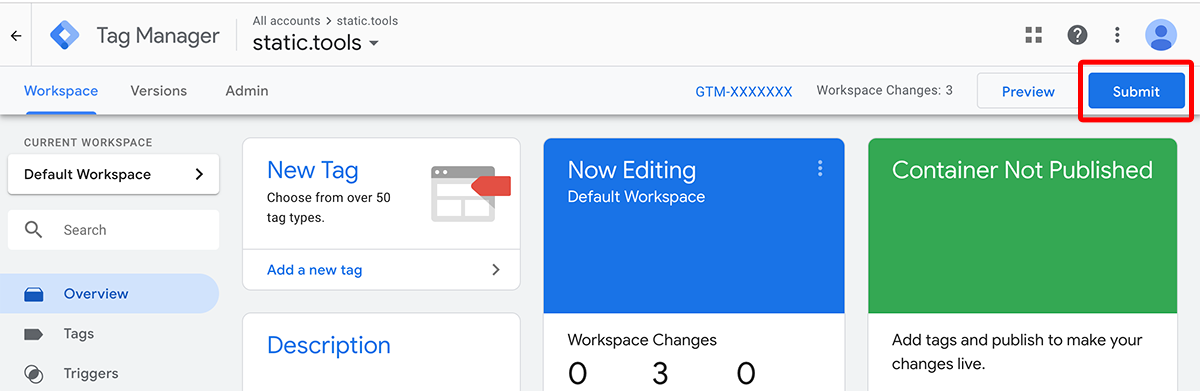
Add GTM Container details and press Publish.
CONGRATULATIONS
🎉 You have now completed the connection between Commerce, GTM and Google Analytics.
Custom Integration
It is possible to integrate Commerce with any analytics provider by listening for the transaction.complete event and handling the result yourself.
This is best implemented by a developer that understands both the data that we provide and the API of the Analytics system that you wish to integrate with.
NOTE
Ensure you follow best practices and do not pass any personally identifiable information into your analytics provider or any other system.
To manually handle the data from a completed transaction attach a listener using the following code:
// Ensures Commerce is available
document.addEventListener( 'commerce.ready', function () {

  // Listens for the completed transaction
  commerce.subscribe( 'transaction.complete', function ( event ) {
    // You now have access to the data via event.data
    console.log( event.data )
  } );
} )
The event has the following format:
{
  data: {
    invoice: { ... }, // The invoice response
    message: 'Thank you for your purchase. ...',
    order: { ... } // The order that was processed
  }
}